Manage Docker containers with Portainer
Simplified Docker containers management with Portainer

Introduction to Portainer
Managing Docker containers can be a daunting task, especially when dealing with multiple containers across various environments. Portainer simplifies this process by providing a user-friendly interface to manage Docker environments. Whether you are running a small home lab or managing enterprise-scale deployments, Portainer offers the tools and features to streamline container management.
Key Features of Portainer
- Intuitive User Interface: Portainer provides a simple and clean web-based UI that makes managing Docker containers, images, networks, and volumes straightforward.
- Multi-environment Support: Manage multiple Docker environments from a single interface, including Docker Swarm and Kubernetes.
- Role-Based Access Control (RBAC): Implement fine-grained access control to ensure that users have the appropriate level of access.
- Application Templates: Quickly deploy common applications with pre-defined templates.
- Monitoring and Logging: Access real-time stats and logs for your containers, helping you monitor performance and troubleshoot issues.
Deploy Portainer with Docker
Create a Docker Volume for Portainer Data
docker volume create portainer_dataDeploy Portainer
docker run -d -p 8000:8000 -p 9443:9443 --name portainer --restart=always -v /var/run/docker.sock:/var/run/docker.sock -v portainer_data:/data portainer/portainer-ce:latestAccess the Portainer UI
Open your web browser and navigate to http://<your-server-ip>:8443. You will be prompted to create an admin user and password.
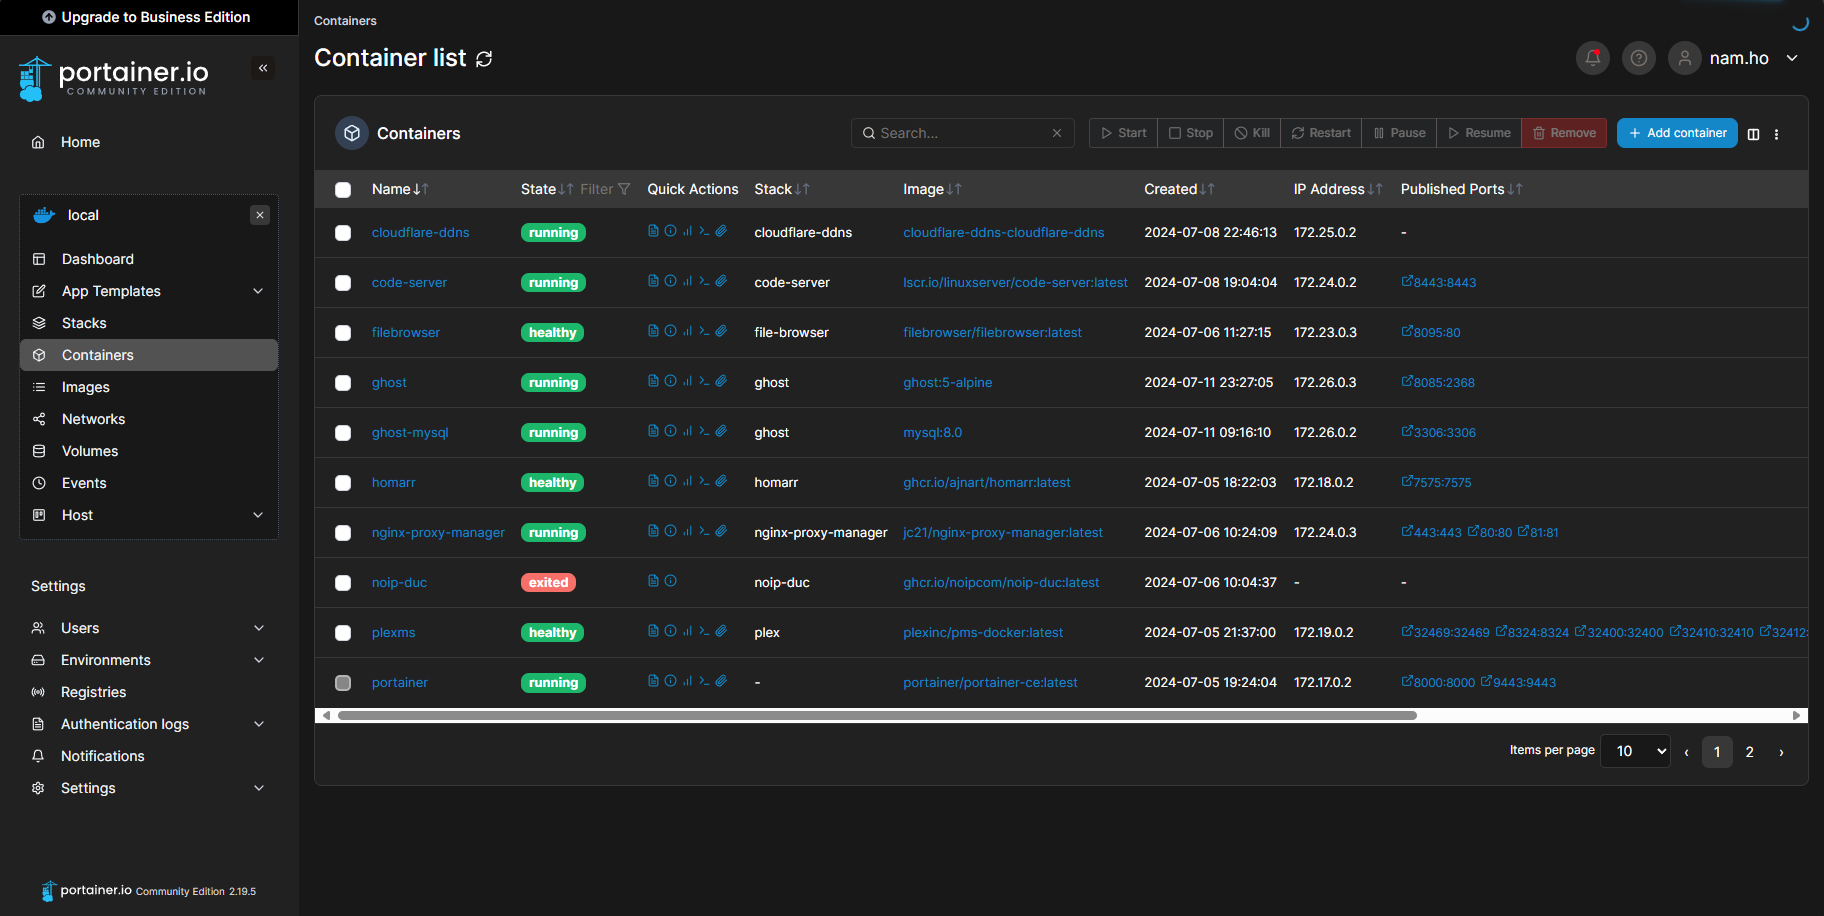
After logging in successfully, you can manage stacks list, containers, images, etc on the UI.

Create a container using the Portainer interface
Create a Docker container using a Docker image
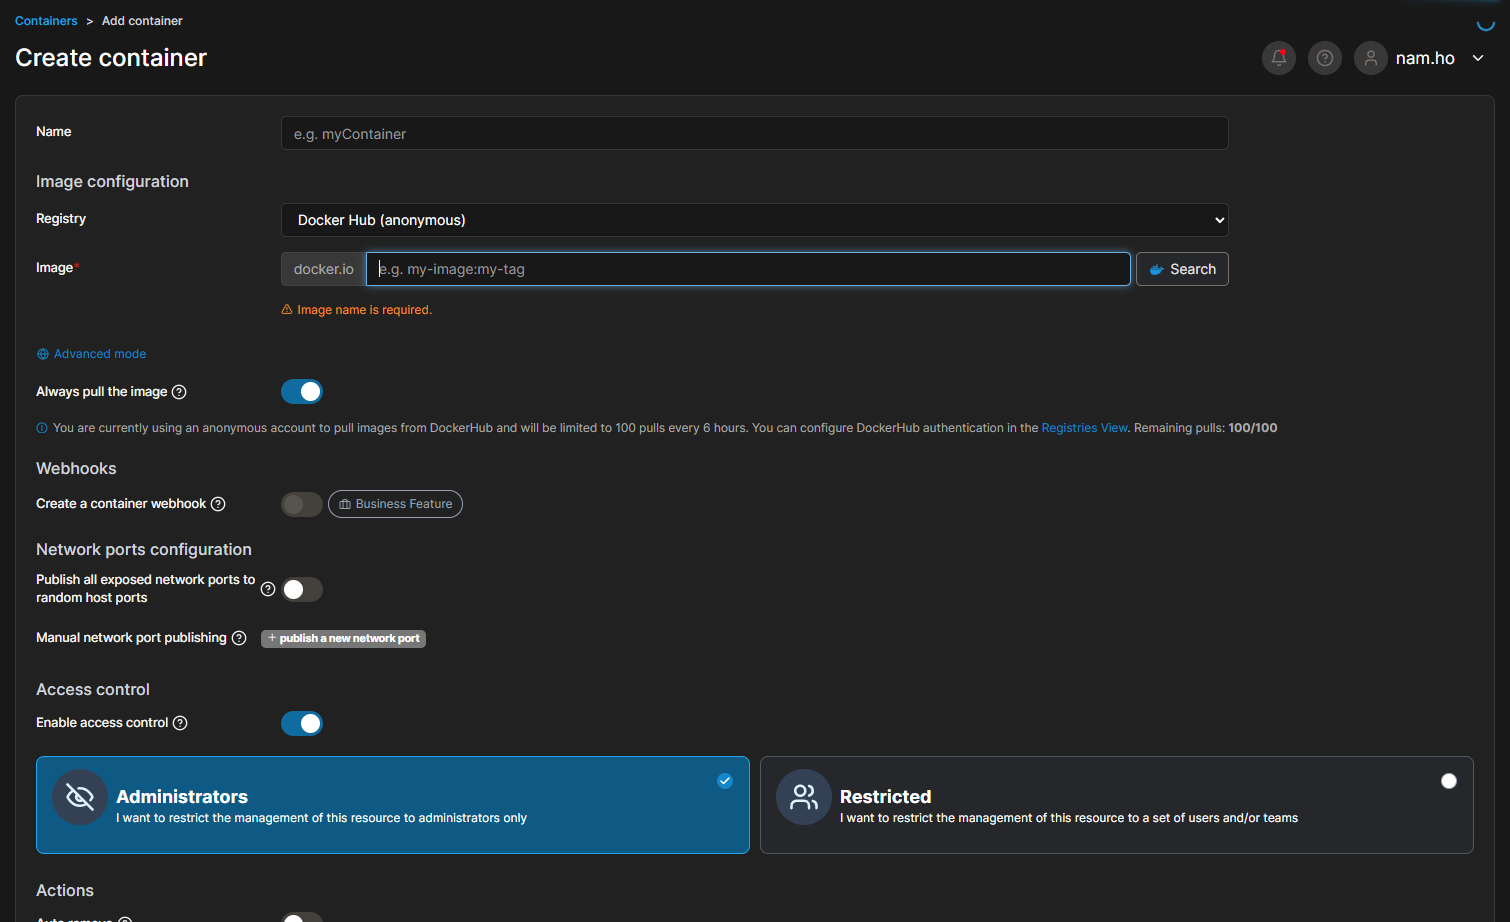
- Add Container: Click on
Containers>Add Container. - Container Details:
- Name: Provide a name for your container.
- Image: Specify the Docker image (e.g.,
nginx:latest). - Port mapping: Configure port mappings to expose container ports on the host.
- Optional Settings: Configure volumes, environment variables, and network settings as needed.
- Deploy: Click
Deploy the containerto start the container. - Verify: Ensure the container is deployed successfully in Portainer.
Create a stack of containers using Docker Compose
- Prepare your
docker-compose.ymlfile - Add Stack: Click on the
Add Stackbutton. - Upload the
docker-compose.ymlfile:- Enter a name for your stack.
- Paste the content of your
docker-compose.ymlfile into theStack file contentstext area. - Alternatively, you can upload your
docker-compose.ymlfile directly if it's located on your machine.
- Deploy the Stack: Click on the
Deploy the stackbutton.
Revisit docker-compose.yml files in Portainer
Sometimes you might want to revisit the original docker-compose.yml files that you used in Portainer, then by default you can get them here
sudo -i
cd /var/lib/docker/volumes/portainer_data/_data/compose
Summary
Portainer offers a user-friendly interface for managing Docker containers on a home server, streamlining deployment, monitoring, and scaling. It enables users to effectively orchestrate container environments, enhancing productivity and optimizing infrastructure for modern application needs.
